Installing SSDT for Visual Studio

Installing SSDT for Visual Studio

Step 1 :Download Visual Studio (if not already installed):

    • Download Visual Studio from the official site.
    • Choose the Community edition based on your needs.

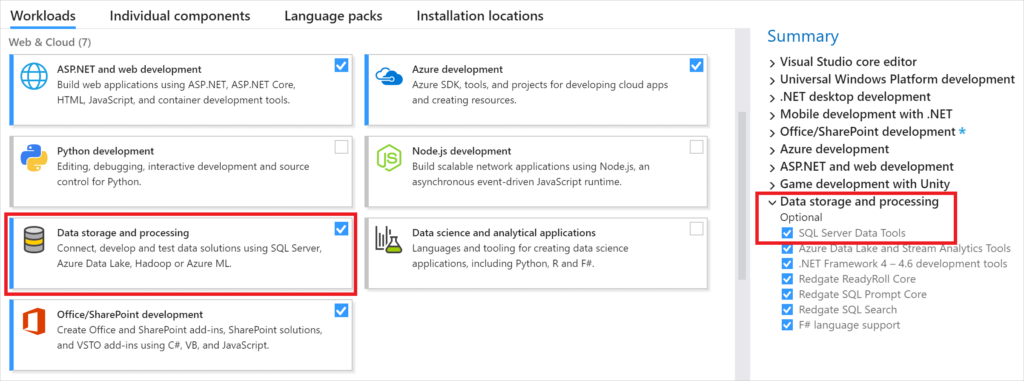
Step 2 : Install Visual Studio with SQL Server Data Tools

    • Launch the Visual Studio installer.
    • Select the “Data storage and processing” workload.
    • Ensure the checkbox for “SQL Server Data Tools” is selected.  

Step 3 : Install and Launch SQL Server Data Tools:

    • Complete the Installation process.
    • Open Visual Studio and start creating or editing sql server projects.

                                                        End of SSDT for Visual Studio